Saturday, March 16, 2013

Art Deco Camouflage Cream - Disappearing Trick!

Hi friends! I hope everyone is having a peaceful week.  I've really been suffering from acne break outs and dry skin lately. Due to this, I have uneven skin tone and blotchy acne marks.  And if you're like me, having bad skin is really a deal breaker.  When you have bad skin, you lose the fervor (/!?) to dress up and put make up on your face.  Ugh!


Due to this, I've been on the lookout for the best concealer product out there.  I've been hearing the buzz about Art Deco camouflage concealer from various beauty blogs that I read and follow.  And so I decided to get it!

So how did it fare on me? Read on to find out!


 Art Deco Camouflage Concealer


It's just a small product.  But don't fret because this beauty packs in the puch! It has very opaque coverage. It comes in a plastic slide cover.  I suggest for you to buy the magnetic compact case to house this product in. 


Bought it for 450 Php from the BeautyBar at Bonifacio High Street.


 Don't let the size fool you.  Even if it's only at 4.5 g, that's more than enough to cover your whole face! After all this is meant to be a concealer but you can also use it as foundation, as I do.


I also bought the compact case to house it in.  The camouflage concealer has a magnet plate backing to adhere to the magnetic compact.  You can reuse this compact case to house Art Deco eyeshadows or anything that has a metal backing that will fit in here! 


So cute! Tiny but powerful!!! It's no bigger than you regular eyeshadow kit!


  Wanna see some magic?  (Beware though! The following pictures may not be suitable for general audience, scroll down with caution harhar!)

Before (Don't say I din't warn you!)


After! It effectively covered my red marks and scars.  I would need to use a prmier though to blur out my deep scars. I dusted this off with my Maybelline Mineral Smooth Foundation.


 Pros:

  • Does not cake. You can layer it on without looking like a wax figure.
  • Gives a matte finish
  • Really opaque coverage
  • Can be used as foundation all over the face (if you really want to hide those nasty marks)
  • Does not feel heavy
  • Does not have a weird smell
  • The price of 450 Php is justified! 
  • Will last a long long time especially if you just use this sparingly as a concealer.
  • Won't easily come off.
  • Does not require a brush to apply.  I just use my fingers and pat pat pat! For the neat freaks out there, you're most welcome to use a brush.  


Cons:
  • Not widely available.  I think only Beauty Bar carries this.
  • Packaging.  I suggest you purchase the magnetic compact to house this in.
  • Has a tendency to melt during our crazy hot weather. I suggest you keep this in the ref (not in the freezer please)


I'm glad I discovered Art Deco! I now have the renewed passion for makeup and fashion hehehe because of a much clearer face courtesy of this concealer.

Holy Grail Verdict:

Effectiveness: 5/5
Packaging: 2/5
Availability: 3/5
Price: 5/5


Wednesday, March 13, 2013

Shiseido Make Up Workshop - The Beauty Junkee Way

I've been fortunate enough to be chosen as one of the participants to the The Beauty Junkee's Shiseido make up workshop.  The event was held at the Shiseido boutique in Greenbelt 5 on March 10.  It was facilitated by none other than the Beauty Junkee herself, Miss Martha Sta. Barbara.
Left: Eekkkk, I was not able to retouch my lipstick!
Right: The workshop was held at Shiseido Greenbelt 5


I am excited to be part of this as I've been an avid reader of Martha's blog for quite some time now.  Martha basically taught her 12 students  practical tips on how to do our make up.  However, her focus was on making the "tacky" blue eyeshadow work.

I was quite surprised when Martha remembered my name as she was handing out our name tags.  And she also pays attention because she noticed that I had blue eyes (naturally,  eeek just kidding, I was wearing contacts).  Before I go to the tidbits of the workshop itself, let me just say how effortless and gorgeous Martha was during that day.  I was seated at the front row and I could not help but notice how perfect her red lipstick and eyebrows were (konti nalang bibili na ko ng Brow Zing hehehe).  Martha was also able to hold her students' attention and interest throughout the work shop.  I especially enjoyed her keen attention on giving us tips on what we would practically be able to apply on a daily basis.


What I learned:

* It's all about color coordination baby - If you have light skin, and you want to sport the blue eyeshadow, pick a light blue dolor.  If you have dark skin, pick deep blue like peacock greens, teal etc.  FYI blue shadow looks good with brown eyes which most Filipinas predominantly have.

* When applying eyeliner - begin at the middle of the eyelid.  Reason is our eyelashes are anyway thickest at the middle.

* When applying eyebrow make up - It is best to use powder to achieve that natural effect.  Start at the middle of the brow (where the arch usually is).  This way, the end of the eyebrow (near the bridge of your nose) won't pick up so much color from the eyebrow make up.

* You can use a cream eyeshadow as a substitute for eyeshadow primer - Do not use concealers as they contain oils.

* Contour your cheeks by applying a smidgen of matte contouring powder in the hollow just below the upper part of your cheek bone.  Imagine that you're peeling off the skin off your face for a better picture (this is where our session got anatomical hehehe).

* To appear as if you have a higher nose bridge, you can extend your eyebrow to the point wherein it creates a faint shdow that nearly conects to the top most part of your nose bridge.

* To ensure that your eyeshadow is properly blended, you can appply a midtone shadow just above the creaseline to achieve that delineated effect!

* You can turn your look from day to night by applying silver shimmery powder to your eyeshadow.  This will make the color look metallic.

* If you want winged eyeliner, make sure they're even.  Start by staring right into the mirror.  Draw two dots on the outer side of the eyes.  Connect the dot to where your eyeliner ends.

* It is still advisable to use setting powder after your foundation instead of a "setting spray".  Reason is the spray may not adhere well to creams.  It adheres better to powder.

* Do not use bronzing powders for contouring. Use matte powders for a more natural look.

* To avoid harsh demarcation lines in eyeshadow application, you can apply a mid tone shadow just above the lid where the darkest color meets the base.

* If you have plump lips and you want to subdue them, avoid applying gloss on them. Avoid minty lippies as well as they tend to cause a reaction that plumps up your puckers.

* The most versatile eye make up brush that you can ever own is the blending brush.  Make sure to get a good quality one (Note to self!).

* To maximize color payoff when applying eyeshadows, use a patting instead of brush motion.  Brushing actually erases the color that you have deposited on your skin.

* When applying finishing powder, make sure to use

* I should have checked Shiseido first before caving into the lure of Mac's Russian Red. Martha was wearing the most divine Shiseido red lipstick (forgot the color but it was intense red).  The lipstick did not bleed even though she was already talking for over an hour.  Application was a breeze.

Left: Martha and Shiseido's Brand Manager, Jen Jimenez (in black sleeveless top)
Right: Loot Bag!

Oodles of Make Up! What's not to love?

Over all, I totally enjoyed the event. It was like going back to school once again.  I regretted not bringing a pen and notebook to write everything down.  I've noted things on my celphone but silly me accidentally deleted it.


The participants got to take home a loot bag.  We were also entitled to a 1 day 15% discount on all Shiseido products.  I almost bought the Smoothing Powder (1800 Php for a refill).  However after road testing it for 10 minutes, my face oiled up.  It's not the powder's fault because my face is really an oil mine.  If I'm going to fork that amount on a make up, it better control the oil.  I'm glad I tested it first.

I'm glad to meet other bloggers.
Left:  (Middle Girl)  Genzel of Genzel Kisses and Misha
Right : Jaja of Beautycolada who turns out to be my officemate! What a small world.
What I regretted was not learning about the perfect red lippie that Martha was wearing before getting my Mac Russian Red.  Anyone want to swap? heheh

Thank you Shiseido for these.  It's actually my first time to try compressed facial mask ( those tablets are actually facial masks that expand when soaked,  Amazeballs!)

What Shiseido products have you tried?


Monday, March 11, 2013

Happy 5th Birthday Project Vanity

Hullo friends! I'm back!!!! I have not posted anything for a long time as I've been busy with work.  Also, to be honest, I grew lazy and lost my mojo.  I didn't want to resume writing just so I could post something.

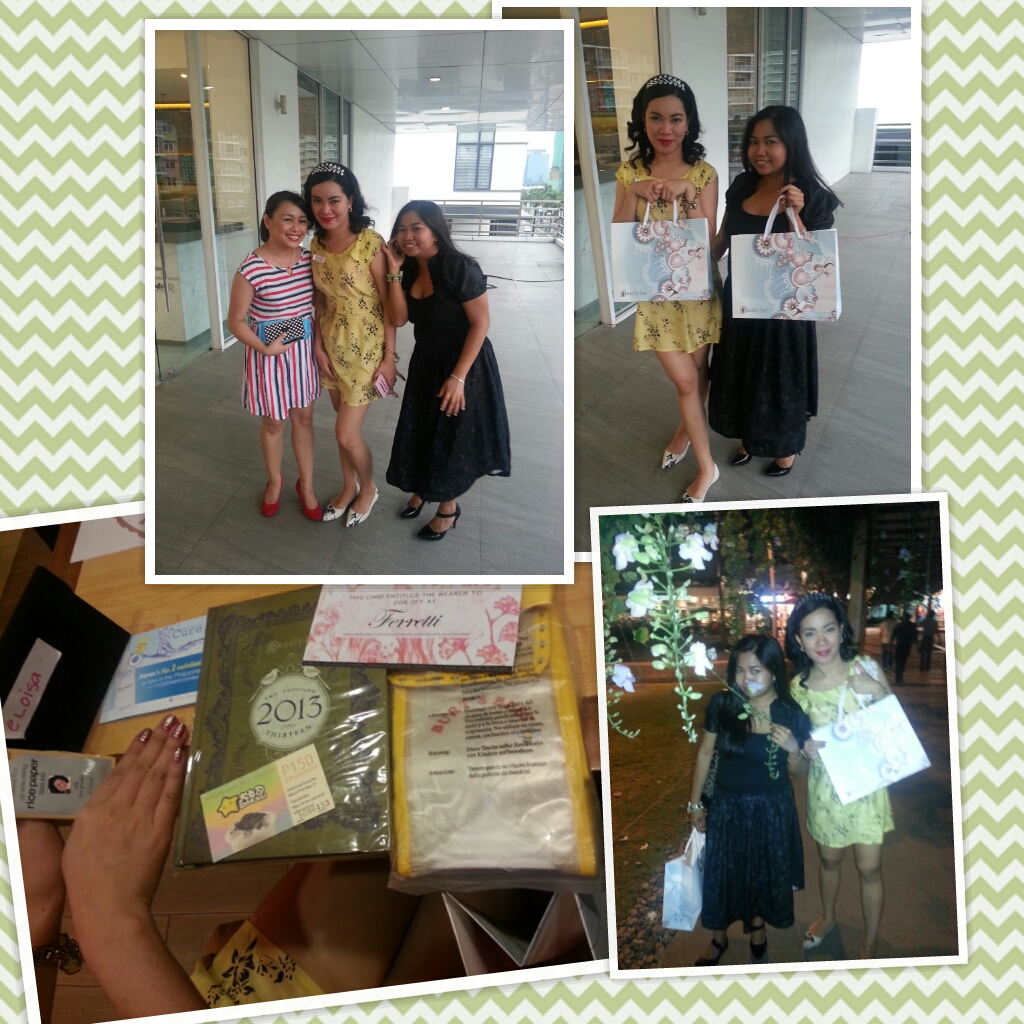
I finally got my mojo back when I learned that I was one of the 40 invited guests of Liz Lanuzo of Project Vanity  to celebrate her blog's 5th Birthday.  I literally jumped for joy when I found out about this as this would be the first blogger's event that I have been invited to.

It was held at the Beauty Bar, The Fort High Street on March 9.  The event was brimming with beauty and fun! I got to meet cool people like other bloggers, Ms. Nelly See of PinkBox accessories, Cheryl Tan of K-Palette make up and Tita K of Live, Love, Lol.

Miss Liz did a demo of easy but high impact make up on her beautiful accomplice, Den.  Miss Nelly shared how she started her she started Pinkbox.  Cheryl Chuaenlightened us how an umbrella paved the way for K Palette here in the Philippines.  These indeed are very inspiring ladies. Talk about Girl Power. This is also timely since March is Women's Month.

I was actually surprised that when I introduced myself to Liz, she even remembers my last name.  Probably because I am always badgering her, hahaha!  But seriously, I love how she mingled with all of her guests.  She even complimented me on the blackness of my hair.  If you know me, you know no one ever compliments me on my hair.  Thank you Liz for seeing the beauty in your humble follower.

Left: Liz of ProjectVanity
Right: Tita K (the one wearing the "bulalo necklacee), Nelly  See (in fuchsia top).

Here are some snippets from the event.  Guests were treated to a makeup demonstration by Mis Liz featuring products from Fairy Drops and K Palette.  Snaps, Liz's furry friend also joined in the fun!

I was delighted to meet other bloggers too.   I got to meet the Beauty Junkee whose blog I've been stalking for quite some time now.


Top Left: Martha Sta. Barbara of The Beauty Junkee
Top Right: Alex Lapa of ReluctantjStylista
Bottom Left: Genzel of GenzelKisses
Bottom Right: Mariana Bantug of The Beauty Bee


Project Vanity was kind enough to give a loot bag to my non blogger friend (The one in black).
Not only was this an event of beauty, but this was also a celebration of passion.  Miss Nelly, Chris and Liz all share the common trait of perseverance and going after their heart's desire.   I could only hope that I can be half as successful as they are.


Wednesday, February 13, 2013

V is for Vacation - Happy V day

Advanced Valentine's Day everyone! Aha! I've really been so stressed about work  so this is a good time for me to unwind.  What better way to detoxify than to go to the summer capital of the Philippines! Yehey! BF and I will be there in a few hours.  Allow me to catch up on some zzzz's here in the bus  I'll tell you about our adventures later!  Believe it or not, it's our first major "field trip" together.

Off to the summer capital!   I've been  so lazy and tired to stamp my nails.  I just stuck some decals  on them. 

How 'bout you, what are your plans this happy heart's day?

Sunday, February 10, 2013

Skinplace - Acne 911

If you've got a pimple sitting on your face - who do you call? Not Ghostbusters! I always dial Skin Place when I have an acne emergency.

Last week, I've been bombarded by pesky cystic acnes.  I've tried putting salicylic acid (My first aid when it comes to zits) and even had them injected at a nearby derma.  These made them subside however they did not go away completely.

So I had no choice but to visit my ever trusted, very good dermatologist - Dra. Mylene Macalood for acne surgery!

Dra. Mylene Ledda Macalood - Zits Beware!


Pore Alert! My face right after washing and ready to be  pricked
Acne surgery, sounds scary right? Actually, no. I find it therapeutic to rid of my face of pimples.  I'm a masochist when it comes to beauty.  The more she pricks and extracts my pimples, the better I feel.  I know that I am getting my money's worth because she inspects every square inch of my face. She can even extract those non evident zits.  The secret to my pain endurance is I prepare myself for what's coming by looking into my handheld mirror on which pimple she's going to pop next (ewwww, sounds gory but it works for me).

The process starts with her nurse washing my face while I'm lying down.  Midway through this process, the face steamer will be turned on to open up my pores.  As soon as my face has been cleaned, Dra. Mylene will then work on me.  Using a surgical blade, she would prik the skin on top of the pimple.  This will allow the pus/whitehead/blackhead to be extracted safely without causing permanent scars.  This is why we should leave the zit popping to experts!

The piece de resistance for me is when Dra. Mylene leaves the best for last! She would pop the cystic and big zits last! As soon as the pus gets extracted, my face does not feel itchy anymore.  I get a different kind of high from that hahah!

So how far did I go for this? Far enough I should say.  I'm from Taguig and her clinic is Taft Avenue in Manila.  After rendering 3 hours of overtime in the office, I  went to to her clinic which took took another 3 hours of commute.  Not only did I have to brave through the overcrowding in the MRT (as it was rush hour), I also had to endure the people's stares at my red face.  Luckily, when I came in to the office 8 hours after the surgery, the swelling and redness have already subsided.

I wish that Dra. Mylene would put up a clinic near Makati or Taguig soon so that I don't have to commute like that again.


Overall, I am happy being Dra. Mylene's patient.  She is very nice, soft spoken and very meticulous! I've been her patient for almost 5 years now.   She also does not upsell services to you.  I am still able to use the current products I'm using. If you have a skin emergency, Skin Place may just be the answer for you!

Skin Place is located at:
Room 304 West East Center
1336 Taft Ave (Fronting PGH, Beside KFC Near Faura)
2PM-6PM
521 2854

Price: 700 Php for acne surgery

Holy Grail Verdict:

Effectiveness: 5/5
Price: 3/5
Accessibility: 2/5


Sunday, February 3, 2013

Salon Beauvoir - Rebond Time


Last Jan 27, I made true to my promise and finally ventured into the first steps of switching salons.  I came back to Salon Beauvoir for my hair rebonding  treatment.  So how did it go? Well it's for you to find out!
Random spots at the salon.  Look how fab and relaxing this place is!


The experience was nice.  I went there at around 1PM and was instantly offered their signature red iced tea to start with.  Then I was lead to my chair where all the magic would happen.  I was then lead to the shampoo area so that Miss Monette (my stylist and creative director at the salon) could assess my strands.
Red Iced Tea to start with

After washing and blowdrying my hair, it was determined that my tresses are too weak to handle the rebonding treatment so I had to have L'Oreal Inner Logic treatment done first.  It's something that would help ease my cuticles into receiving the strong treatment from the rebonding after.  This treatment was left on my hair for around 20 mins.
L'oreal Inner Logic Treatment was left on my hair for 20 mins to prep it for the rebonding treatment


After this, the L'oreal Extenso Moisturist  cream was applied to my hair in 3 different strengths.  At the root of my hair, Miss Monette applied the extra strength solution as my kinks are there and the roots are really resistant.

EX L'oreal Extenso Moisturist for my resistant roots 


The middle of the hair received the cream for Natural hair.

L'oreal N Xtenso Moisturist for Natural Hair was applied to the middle of my hair 


The colored ends of my mane got the one for Sensitized Hair.
L'oreal Xtenso Moisturist N for my sensitized ends


It was left for about 20 Mins and then I was off to the shampoo area again to have it rinsed off.

The smoothening creamms were left on my hair for about 20 mins.  My hair was cling wrapped while sitting under the futuristic looking heater to prevent moisture from escaping


Ok, now comes the most arthritis inducing part:

Once my hair has been dried carefully, Miss Monette then straightened it using a flat iron. Oh how I pity her as she had to go through my very this mop of hair.  I appreciate the fact that she took her time in ironing those strands.  I could really see that she was only ironing sections of my hair which are paper thin.  Other salons would grab a fistful (!?) of hair all at once to breeze through the straightening process.  

Finally, after around 3 hours (could not really remember how long it was for) of straightening it, color was applied to my hair.  Miss Monette chose a dark shade for my locks.  I must say that after washing it, I was not happy with the color as people are used to seeing me with light hair.  However, she explained to me that the color was used to fill in the cuticles of my hair to "fatten" the strands.  My hair would not be able to take anything of light color at that moment.

After this, a hefty and generous dose of Neutralizer was applied.  Miss Monette emphasized that she was not scrimping on the neutralizer as my hair needed it.


Hair was then rinsed off and dried.  It was flat ironed again for the last time.  But this time, it only took around 15 mins to do it since the strands are already flat.


Everytime my hair is washed, Chris would  always ask if I'm stiing comfortably.  I love how he does not scratch my scalp at all!

My hair after the process.  Notice how full bodied it is.  I am also being flanked by Chris (the master blower) at the left and Miss Monette (the hair master and L'oreal Creative Director herself) at the right.


Here are my thoughts:

* I love how my hair did not feel rubbery, stretchy and frizzy after I've washed my hair for the first time.  I guess the application of 3 smoothening creams in different strengths made this difference.  My rebonding treatments from before would only have the smoothening cream applied to the regrowth.  However, even if it was only concentrated there, it would still drip down to the middle and ends of my hair.  This caused my hair to get fried!

* My hair is still frizzy after washing it.   However, I have already expected this.  However, comparing this to my previous treatments, it was definitely less frizzy.  I would expect the frizz to abate after a few more washes.

* I love how they did not blow my hair into epic proportions! They blow dried my hair without causing it to poof so much. I never liked it when people stare at my hair while being dried. 

* I love Miss Monette's sense of ownership on my hair. Wahahaha she did not even let Chris (the master blower cum assistant) touch it during the critical stages. 

* I love how Miss Monette looked after my hair even after I have already left the salon.  She replied when I texted her the following day that my hair got messed up and frizzy during sleep.  

* I love how Miss Monette gave me a Kerastase follow up treatment for free.  She said that if my hair gets frizzy, she'll give me one.  She got really challenged by my hair.

* I do not love how I ended up with a darker color.  However, I'm not going to tear my hair out because of this. I'm planning to come back there sometime this February to have my hair colored.

* I do not love how the regular price of this treatment goes for.  I got this treatment for a discounted price of 3200 Php because they're having a promo.  But the regular price is really about 6000Php to 7000 Php.  

Speaking of price, this salon treatment set me back by around  6000 Php because of the Pure Logic and Hair Color treatments.


Saturday, February 2, 2013

Product Obsession 101 - Signs and Symptoms

Have you ever found yourself  lemming for something that you sometimes lose sleep over it?  I don't know about you, but I have!  My biggest product obsessions had been Melissa shoes and Curlformers!

Melissa Shoes and Curlformers - My Past Obsessions!


Here are the symptoms:

1) Online Exposure - I get my lemmings from my various innocent forays through  blogs.  I would aimlessly browse through different beauty blogs and if something tickles my fancy, the tiny niggling sensation would begin.  I got obsessed with curlformers when I learned about it from Curlynikki.com.

2) The Itch -  When I learned about Curlformers, I got intrigued by how it promised to curl hair without heat! I was thinking that it could be a fix for my frizzy ends.  There was niggling feeling within me to find out more about the product .  I literally spent like 2 hours a day thinking of where I can purchase these as they were not sold here in the Philippies.

3) The Stalking - I know that I like a product well enough if I begin stalking review sites and blogs about it.  During my early stage of addiction to Melissa shoes, I would spend 4 hours a day looking at various photos and reviews about them.  I would also drop by Trinoma or Rustan's just to fit a pair!  The stalking stage was when I lost most hours of sleep.

4) The Justification -  I would not spend 1000 Php on make up but would not bat an eyelash forking over 5000 Php for shoes! And that exactly how I justified my used to be lucrative Melissa shoes obsession.

5) Desperation - I was desperate enough to get my hands on original Curlformers that I even considered borrowing or applying for my own credit card just to be able to order it online offshore.  Imagine that! I was also almost desperate to nab the then latest Melissa Patchuli Floc that I would lose sleep just trying to scour through different malls even if I still had to go to work that day.

6) Conscientious Purchase - One thing that I'm really proud of about myself is that I'm not an  impulsive shopper.  If I see something that I like, I would sleep over it first. If it's below 500 Php, then I just sleep over it for a day.  If it's really expensive like 4000 Php for shoes, I'd think it over for a minimum of a week.  If I still find myself lemming for that item, I would definitely purchase it.  I also make sure to check out different stores first before buying. This is why I hate shopping in Mall Of Asia because the mall is too big for me to shop around in!

Now that I know the symptoms, of course I also know the cure. Just like with all medical conditions, prevention is still better than cure.  To prevent my mind from lemming about something, if I know that payday is still days away, I stay away from shops and beauty blogs.